Thursday, November 14, 2013

Smells like the holidays

Chris making a spiral
The holiday season is filled with traditions.  My family has a ton of them both small and large.  I decided to kick off this holiday season with a little something my family does around this time of year: cloved oranges. I picked this one to start because it is quick and easy and it makes your home smell of wonderful things. You only need two things: whole cloves (I got about a fourth of a cup and it was PLENTY we have tons left over) and oranges (I did about 3, but you can fill a bowl in the living room or make a centerpiece for the kitchen/dining room table, whatever you want). Pick a design, and stick the cloves into the oranges in that pattern. Think along the lines of cutting a pumpkin, but a bit easier. You can space the cloves out as much or as little as you want, but keep in mind that these are pretty strong smelling and the more cloves you use the stronger the smell will be. You also might want to use a tissue or paper towel when pushing the cloves in because they are sharp! Trust me, nothing will put you in the holiday spirit than sitting back and smelling these amazing cloved oranges.


Monday, November 11, 2013

The honeymoon phase ain't got nothin' on us

I've never really understood the meaning of a honeymoon phase when it applies to the person that you are supposed to be with. In my opinion when you are with that perfect person for you, the honeymoon phase never ends which is why I would like to dedicate this post to that person in my life who is the best boyfriend and best friend ever. Chris and I celebrated our 3 year anniversary on the 7th, and to celebrate we rented a little cabin up in the Catskills in Stamford, NY. We had a lovely trip. I'm including a list of places that we went at the end of the post in case you are ever in that area. 

Breakfast in bed cinnamon sugar rolls, bacon, fruit salad, and coffee! 

View from our front window as it started to snow.

Our little home away from home.

Our field and the view of the mountains.

The main room taken from our bedroom loft.

Relaxing in front of the fire.

Champagne from our host in front of the fire.

Beer puddle (?) outside the Ommegang Brewery.

Chris being a monk.

Ommegang brewery.

Clearly we went a bit crazy in the gift shop.

Ommegang brewery tasting room.

Driving through the mountains.
Fall trees.
Recommendations:
East side of the Catskills:
If you are coming from the south you will pass by Rosendale and New Paltz. They are a quick little detour right off the highway. New Paltz has more because it is a bigger town (and college town), but it has lots of cute shops for gifts, coffee, etc.  Then, you can scoot on over to Rosendale to have lunch at the Rosendale cafe on the main drag. The cafe is owned by one of my best friends from college parents and is amazing food.
Also on the east side of the Catskills, but actually in the mountains is Woodstock.  We stopped there on the way back.  It is a super cute town with lots of shops.  Bread Alone has a shop there (I HIGHLY recommend their apple cider sourdough), there was a very cute book shop called The Golden Notebook (on Tinker st.) is awesome for kids books.  Finally, my last recommendation which came from someone that Chris works with is Peace, Love, and Cupcakes (also on Tinker). This place was amazing. All the cupcakes are named after famous musicians, and they very fudgy cupcakes with amazing frosting.  My one complaint is that they are not easy share, but, then again, who wants to share a cupcake.

West side of the Catskills:
We stayed in Stamford, NY, and the one place I can recommend there (it is a TINY town) is TP's on Railroad ave. It's an a little diner, nice people, good food, amazing prices.  One place near by (pretty much the same town) was Hobart book village. It is basically a village of bookstores.  We drove by it, and it looked like a lot of fun.
We spent Friday in Margaretville which is a small town with lots of little shops. Two stuck out to me, one was an antique shop on Main. st. called 768 Main it is a coffee shop and antique store, but they also sell local maple syrup/chocolate syrup/caramel sauce. The other store we found there was a gourmet grocery store called The Cheese Barrel. They have lots of fresh cheese spreads, homemade candy, meats, etc. On the way to Margaretville we stopped for lunch at the Andes Hotel in Andes, NY.  The chicken caesar salad (me) and the burger (Chris) were both GREAT.
On Saturday we spent the day in Cooperstown, NY.  Probably one of the bigger towns in the area.  We went to the Ommegang Brewery as you can see from the pictures which was a lot of fun.  The tour was free and the tastings were $3. They also have a pretty good gift shop and a cafe which we didn't eat at so we can't vouch for it. We did eat at the Otesaga Hotel bar and grill for lunch.  It was good food, but the view of the lake is what you go there for.  It would be perfect in the summertime.  We ate dinner at an amazing restaurant on Main st. called Alex and Ika's which had GREAT food, but you definitely need a reservation.  It was crazy in there. We stopped at a few stores around town including The Firehouse market (another gourmet grocery store), there is a crafts store on Doubleday court (I can't remember what it is called) that sells stuff from artists in the area.  We had so much fun on our trip.  I hope it inspires you to plan one for yourself!

Compared to the month of October, November has been struggling for me.  HOWEVER, I am going to start focusing on Thanksgiving recipes, things to bring to parties, holiday DIY gift ideas, and decorating for the holidays! So get ready for lots of upcoming posts!

Tuesday, October 29, 2013

Rest In Pie

It's almost Halloween which has meant I've had to step up my game. This spooky graveyard pie is easy and fun. I got the inspiration from this Martha Stewart recipe, but I pretty much completely changed it.

What you will need:
Pie pan
16 Graham crackers
1 stick unsalted butter
1.5 quarts Breyers Oreo blast ice cream (or whatever other flavor you pick)
Oreos (10 just cookies...and yes that means you get to split them apart and eat the side with the frosting, and 5 with the frosting)
5 milano cookies (I picked 5, you can use however many will fit)
1 small tube red gel frosting
1 toothpick
Blender- optional, but makes your life a lot easier

What you do:
1) Pre-heat oven to 325 degrees 
2) Grease the pie pan.
3) Break up the graham crackers into large pieces in the blender (if you aren't using a blender put them in a zip-lock bag and mash with your hands into small pieces), and use the chop setting to make small pieces.  You may have to turn the blender off, shake it up a bit, then press chop again.
4) While this is happening, melt butter in the microwave, and let it cool slightly before pouring over the graham cracker crumbs, and press chop again until the butter is fully mixed.
5) Pour graham crackers into greased pie pan and press down with clean hands. I found that pressing down the sides first was easier. Make sure that it is even all around.
6) Put the pie pan in the oven for about 10 minutes/until the crust is SLIGHTLY browned. When it is done, take it out, and let it cool completely.
7) While the crust is in the oven, prepare the gravestones. Put 5 or so Milanos on a plate. Squeeze a little red gel frosting onto the plate, and with the tip of a toothpick scoop up a little of the gel.  Be very careful, and write R.I.P. on each of the Milanos.
8) Leave them flat on the plate, so that the gel doesn't drip.
9) While the pie crust is cooling, spoon the ice cream into a bowl and stir with a spoon until smooth.
10) Pour onto crust, and spread evenly, and set aside.
11) In the blender use the chop setting to crush the oreos into crumbs.
12) Use spoon to spread over the ice cream, and put the grave stones in.
13) Put into freezer overnight. Serve cold ;)


Sunday, October 27, 2013

Raise your pitchforks and torches for these Halloween bottles

Alright, as promised here is a crafty little project that I completed while watching the new episode of The Walking Dead (so excited for next week!). So that means I finished these bottles in under an hour, and I bet you could too.  The ghost one was obviously easier. The inspiration for this project came from this blog, but I did them completely differently.

Here is what you will need:
Clear bottles (bottles that had soda in it are perfect...I used Stewarts Orange n' Creame soda bottles)
Paint:
  •  Soft body acrylic paint (white for ghost, green for Frankenstein, orange for pumpkin)...Tempra paint would also probably work, but it won't look as good and will take longer.
  • Regular acrylic paint (black for ghost, red/black/white for Frankenstein, black for pumpkin)...Tempra would work, but it might turn flaky, and it won't be as vivid, you would also have a little less control because Tempra is water based.
*Be warned acrylic paint is permanent. 
Paint brush (a flat edged one will come in handy)
Water

What you do:
For Frankenstein:
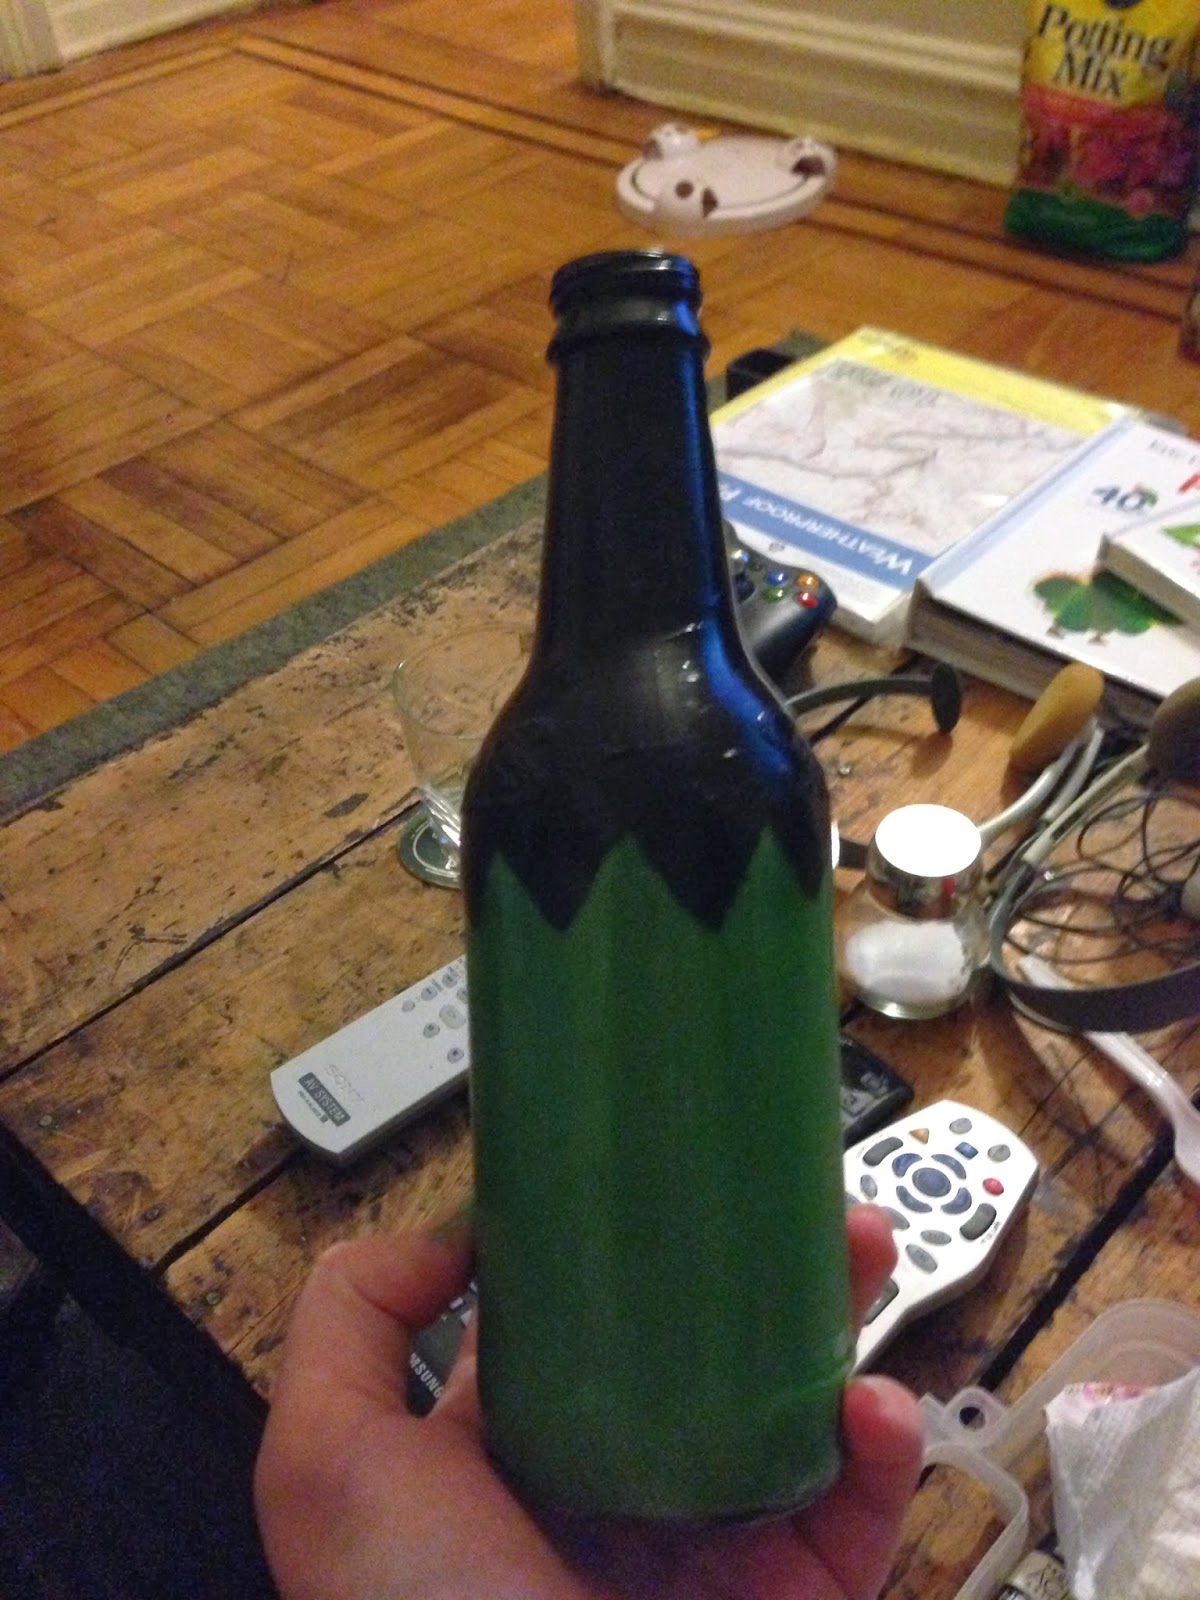
Start with a clear bottle and squeeze about half of the soft body green Acrylic paint into the bottle.  Swirl it around, keep squeezing little bits of paint into the bottle until the entire inside is covered.
Squeeze a little bit of black paint onto a palette. Paint the top of the bottle black, but stop around the curve. I found it helpful it start by painting a line so that I did not cross it. Using a flat edged paintbrush will make this next part easier, but it is not necessary. Paint triangles along the line that you have drawn to make a hair line.
Wash the brush, and squeeze a little white onto the palette. Paint two filled in half circles just below the hairline, and wait for them to dry (with acrylic paint it is really quick...only a few minutes, but with tempra it will take longer).
This picture includes three steps, the first being while the eyes dry, use the red paint to make a straight horizontal line as a mouth. Again, the straight edged paint brush will make this a lot easier. Then, make several vertical lines along the horizontal one. When you have done that, use the black paint to make two black half circles at the top middle of the eye as pupils. Hopefully by then the red paint will have dried (although you can wait a few minutes to play it safe), paint another layer on the red mouth to make it really pop.
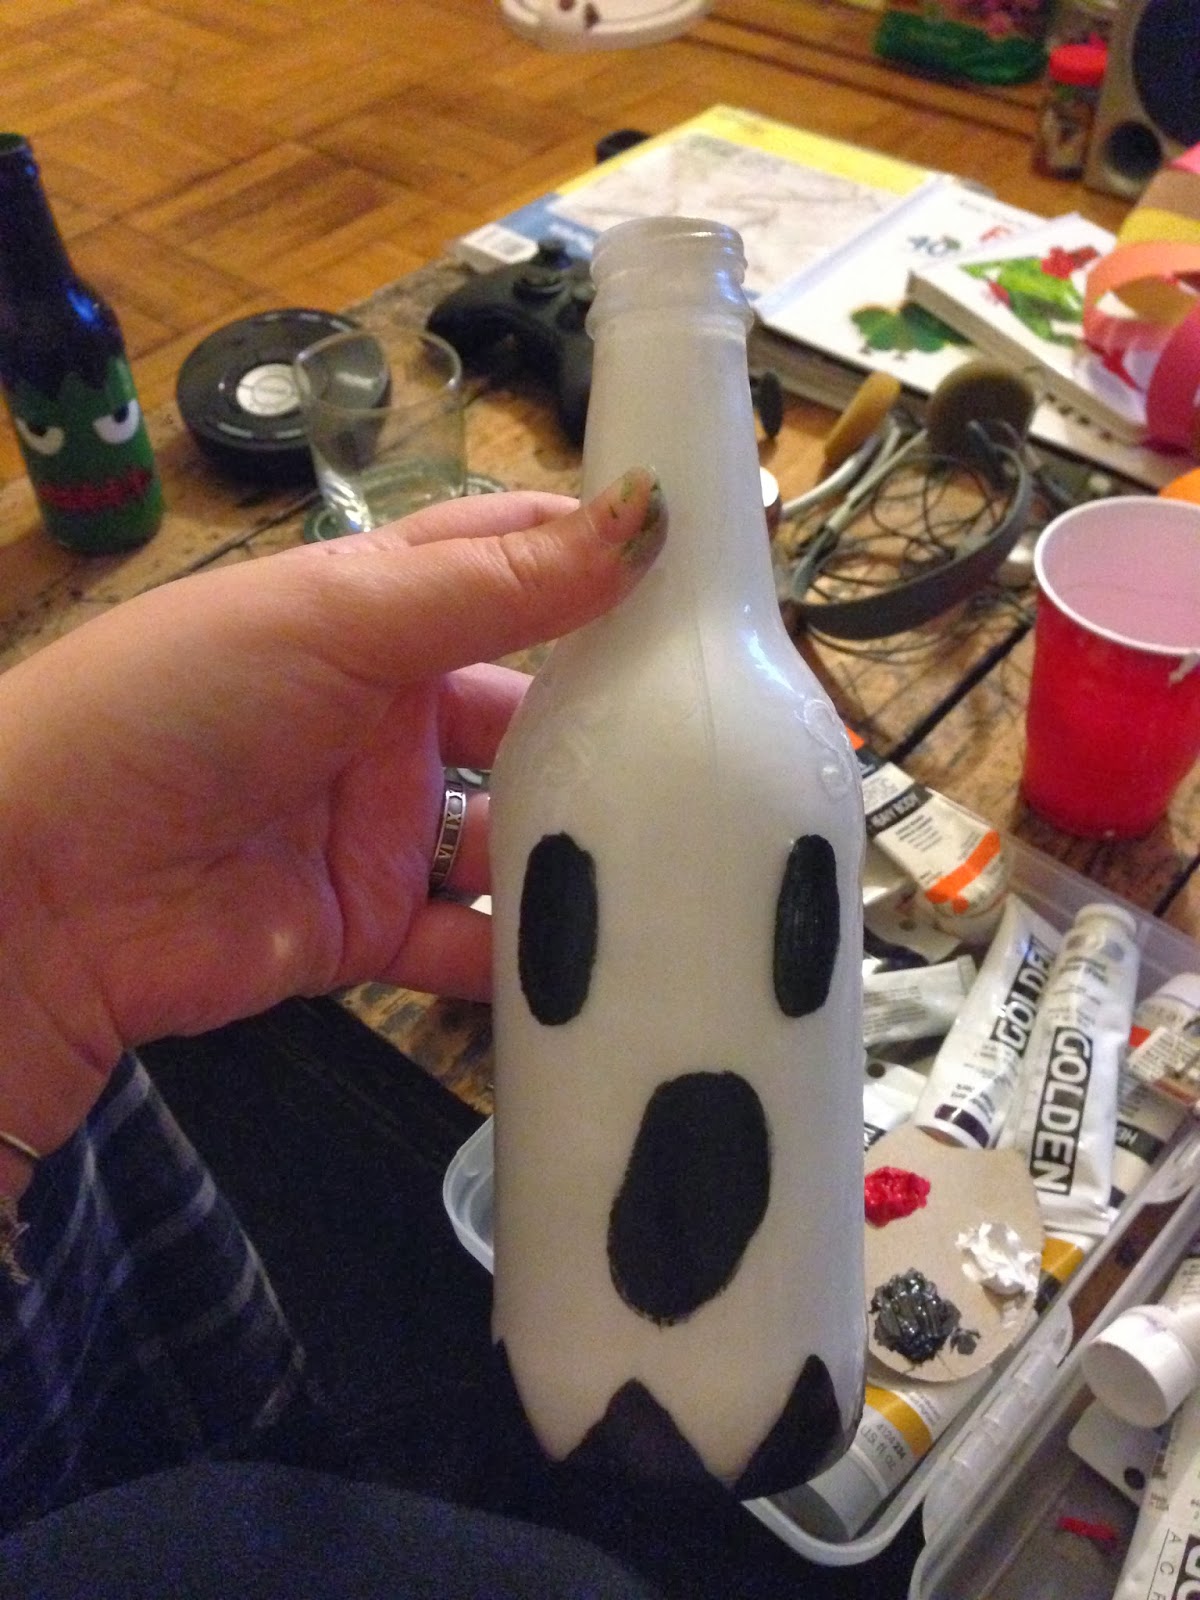
Using the soft body white paint, squeeze about half the tube into the bottle to coat the inside, you may have to repeat a few times to coat the inside completely. Using the flat edged paint brush make black triangles along the bottom of the bottle.
Paint two ovals for eyes, and a sort of warped oval for the mouth. 
Put them out for everyone to see!

Friday, October 25, 2013

It's 5 o'clock somewhere

When I first found the recipe on Pinterest for honey whiskey cupcakes with honey whiskey buttercream frosting with a bourbon drizzle I knew I had to try it. Luckily for me my friend Ben's birthday is on Monday, so I got to make them and give them away quickly so that I don't end up eating them all!

So these cupcakes are surprisingly easy, and they look nice and fancy. They take about 25 mins for the cupcakes, about an hour to cool completely, 15 mins to do the frosting, and about 5 for the drizzle. All in all they take about 2 hours since you don't want to rush anything.

What you will need:
Cupcakes:
3/4 cup butter (1.5 sticks)
1 cup sugar
2 eggs
1 TSP vanilla
1 1/2 cups flour
1/2 TSP salt
1 1/4 TSP baking powder
3 TBSP Jack Daniels Honey Whiskey
3 TBSP milk
12 cupcake liners

Frosting:
1.5 sticks butter (unsalted) *note: this needs to be at room temp, so it should be left out from when you start the cupcakes if not before
3 cups powdered sugar
1 TSP vanilla
2 TBSP Jack Daniels Honey Whiskey
1/4 cup heavy cream

Drizzle:
3/4 cup brown sugar
1/2 cup Jack Daniels Honey Whiskey
1 TBSP unsalted butter

What you do:
Cupcakes:
Preheat oven to 350 degrees.
Put cupcake liners into cupcake tin.
Melt 1.5 sticks butter in microwave until ALMOST melted (not all the way).
Beat in 1 cup sugar until fluffy.
Beat in 2 eggs and 1 TSP vanilla until completely mixed (be careful to not over mix).
In separate bowl, combine 1 1/2 cups flour, 1/2 TSP salt, and 1 1/4 baking powder and mix with a fork.
Add slowly to the sugar mixture and beat until mostly combined.
Add 3 TBSP honey whiskey and 3 TBSP milk and mix until completely smooth.
Pour batter into cupcake liners so that they are about 3/4 of the way full.
Bake for 17 mins (ovens vary, so check at 15) or until toothpick comes out clean.
Remove from oven and put on plate or wire rack to cool completely (will take about 45 mins- an hour).

Frosting:
While the cupcakes are cooling you can start the frosting.
Put room temperature butter (1.5 sticks ) in a bowl, it should be a bit mushy.
Beat until fluffy, then add 3 cups sugar.
Mix until a little crumbly.
Add 1 TSP vanilla and 2 TBSP honey whiskey and mix.
Add 1/4 cup heavy cream (add 1/2 at a time to make sure you aren't adding too much).
Beat completely it. It should be thick in texture.
Put in ziplock bag, and push all of the air out of it. Seal the bag, and cut a small corner in the corner of the bag (the opening should only be about a centimeter wide).
When the cupcakes are cooled, start from the outside rim of the cupcake (at the 12 o'clock position), and work counterclockwise along the cupcake lining to create a swirl ending in the center of the cupcake.
Put in the refrigerator while you make the drizzle.

Drizzle:
Put 1 TBSP unsalted butter in a pan and heat over medium high heat.
Add 3/4 cup brown sugar and 1/2 cup honey whiskey and stir completely.
Stir occasionally until mixture starts boiling. 
Let boil for 2 minutes stirring occasionally.
Remove from heat, and let cool.  Keep stirring or else the mixture will get a skin on the top.
Drizzle over cupcakes with a spoon.
Serve! (or store in the refrigerator)

I promise my next post will be a craft of some sort, I have been doing a lot of baking and cooking posts recently, but I'm already working on a craft project that I hope to post at the end of the weekend.  Enjoy!!


Tuesday, October 22, 2013

Pumpkin spice and everything nice

Everyone loves all things pumpkin spice, especially at this time of year. These bite sized treats are perfect to bring to a party or just have out while relaxing with family or friends. They only take about 45 minutes to make, but they take a while to cool, so be prepared for that. Even better, though, is that it only requires 1 pot and 1 baking pan, so not a ton of bowls or dishes to wash at the end!

Pumpkin spice fudge:

What you need:
Baking pan (as close to 9x13 as possible I ended up using two pans)
1/2 TSP butter for greasing
3/4 cup butter (1.5 sticks I used 1 salted and 1/2 unsalted)
2/3 cup evaporated milk (make sure it is evaporated not condensed... they are not the same thing)
2 cups sugar
1 cup brown sugar
1/2 pumpkin puree (the canned pumpkin in the baking isle or if you wanna make your own try this recipe)
1.5 TSP pumpkin pie spice (most stores will have it this time of year, but if not, you can make your own by following this recipe)
1 12 oz package of white chocolate chips
1 7 oz jar of marshmallow fluff
1.5 TSP vanilla

Optional: chopped pecans or macadamia nuts (I didn't use these cause I don't really like those types of nuts, but for people who do it would taste really good)

What you do:
1) Grease baking pan (or pans) completely with butter.

2) Combine 3/4 cup butter, 2/3 cup evaporated milk, 2 cups sugar, 1 cup brown sugar, 1/2 cup pumpkin puree, and 1.5 pumpkin pie spice in a medium-large pot.

3) Heat over medium heat stirring to mix completely while it heats.

4) Bring mixture to boil, stir constantly to prevent burning until mixture is at 234-243 degrees F (if you don't have a thermometer boil for about 30 minutes).

5) When the mixture has reached 234-243 degrees remove from heat and pour in entire bag of white chocolate chips.

6) Stir until they are completely melted, then stir in the jar of marshmallow fluff and 1.5 TSP vanilla and mix completely. Make sure that you stir completely because there are usually pockets. To stir completely takes about 3 minutes of stirring and folding.

7) Pour evenly into pans and smooth the top with a spatula.

8) Leave out until the fudge has cooled to room temperature.

9) Cut into 1 square inch pieces, and EAT (or share if you are feeling generous)!

If you are storing them keep in an air-tight container in the refrigerator.


Friday, October 18, 2013

The good, the bad, and the delicious

Heart attack on a plate.  That was what my mother used to call any dessert so decadent that it was a legitimate health concern.  I think these "enhanced" snickers might qualify. That being said, if you cut them into small enough pieces they are nice bite sized candies to bring to the office or to a friends house.  The best thing about them is that if you store them properly (in a sealed container) they last forever especially in the freezer. The original recipe was found here, but I have some additional notes to add. It takes a long time (it took me about 3-4 hours), but they are definitely worth it, and you can spread the work out over a whole weekend, so that it isn't that bad.

What you will need:
Baking pan
Tin foil
2 sticks unsalted butter
1 1/2 bags of chocolate chips (milk or semi-sweet)
1 jar creamy peanut butter
1 jar marshmallow fluff
1 cup salted peanuts
1/2 cup sugar
1/2 cup whole milk
2 1/2 TSP vanilla extract
14 oz bag of caramels
1/4 cup cream
2/3 cup brown sugar
2 TBSP heavy cream
1 cup flour
1/4 tsp salt
1 cup pretzel sticks

Prep:
Grease tin foil and put in pan (make sure it is entirely greased up the sides).

Layer 1: Peanut butter chocolate
Put 1 1/2 cup chocolate chips and 1/4 cup creamy peanut butter in a microwavable bowl and microwave for 30 seconds at a time stirring in between until melted.  It usually takes about 1 minute 30 seconds.
Pour into the baking pan over the tin foil and let cool in the refrigerator for about 30 mins.  Really do wait until it is hard, it makes things much easier in the long run.

Layer 2: Nougat
Chop 1 cup peanuts.
In a pot melt 1/4 cup unsalted butter over medium heat.
Add 1/2 cup sugar, 1/2 cup whole milk.
Stir until sugar is melted.
Cook for 5 minutes stirring frequently.
Add 1 1/2 cup marshmallow fluff and 1 TSP vanilla extract.
Mix completely while still on medium heat. When completely smooth, remove from heat and add 1 cup chopped peanuts, and stir completely.
Pour over the hardened chocolate layer in the baking pan, and put back in refrigerator, and let cool about 30 minutes (it won't ever be completely hardened because it is a chewy layer).

Layer 3: Caramel
Unwrap all of (14 oz.) the caramels, and put them in a pot, add 1/4 cup cream.
Melt over low heat stirring occasionally until caramel is smooth.
Pour over over nougat layer.
Put back in the refrigerator until cool (about 30-45 mins, but again it will not be completely hardened).

Layer 4: Brown butter cookie dough
In a pot melt 1 1/2 sticks unsalted butter. Let it get frothy and turn brown (it will start smelling a bit nutty).
Let cool for 10 minutes.
Pour butter into bowl, and add 2/3 cup brown sugar, 2 TBSP heavy cream, 1 1/2 TSP vanilla. Beat until completely combined. Make sure that there are no clumps of brown sugar.
Add 1 cup flour and 1/4 TSP salt, and beat until completely combined.
Pour and spread across the caramel layer, and put the pan back in the refrigerator and let cool until hard (about 45 mins.).

Layer 5: Peanut butter chocolate
Put 1 1/2 cup chocolate chips and 1/4 cup creamy peanut butter in a microwavable bowl and microwave for 30 seconds at a time stirring in between until melted.  It usually takes about 1 minute 30 seconds.
Pour into the baking pan over.
Break up pretzel sticks over the chocolate layer.
Put back in the refrigerator for about an hour.
Cut into bars.
(If you can keep from eating them all) store them in a sealed container in the refrigerator.

Be warned this project takes a long time, but as I said before, you can spread it out over a day or a weekend which makes it easier. They are absolutely amazing, but make sure you brush your teeth afterward!!